


Cut your electricity usage in HALF of your clothes dryer
using low cost, low technology, do it yourself methods
If you do not want to read all technical stuff, go here for the simple instructions on how to reduce the amount of electricity you use to dry clothes by up to half or MORE!..
http://www.sweetmk.com/2012/09/save-half-of-the-electricity-required-by-your-dryer/
Most attempts to use less electricty are successful, but, you are less happy.
Examples include:
- CFL bulbs (did a wife EVER become happy when the bathroom bulbs were changed to CFLs’!!??)
- Changing the thermostat (who enjoys being warm and humid in the summer or cold in the winter!!??)
- Hanging laundry rather than using the dryer(Do I need an example here!!?? It is illegal in some neighborhoods!!)
- Phantom electricity (Sure, I am gonna unplug my electric garage door opener to save a few dollars a year!!)
The list goes on. We hear about the methods over and over in the news. They are simply methods of saving electricity that are not successful.
Why are they not successful? Two reasons; we do not like change, and, the energy savings methods make us less happy!
My goal for energy savings in my home was to implement projects that would
- pay back the quickest – 2 months or less payback time – first
- AND the projects had to be accepted by the family.
That was an agessive goal, but, I felt if I could be successful, it would inspire me to do other projects.
The Clothes Dryer
My first project would have to be the electric clothes dryer. I wanted this to be successful because everybody in the house used it. We all contributed to laundry duty.
The dryer we had would turn on the heating element, heat the air, blow the air across the tumbling clothes, then exhaust the humidified air out of the house.
Not only did the dryer use lots of electricity, the cycle to dry a load of clothes was longer than the cycle to wash a load of clothes.
") This big hole is going to suck less of my money!!
This big hole is going to suck less of my money!!
The dryer was a bottle neck in the laundry preocss.
If you would hear the washer do its final spin, you would jump up to switch the laundry, only to find the dryer was still running. The dryer required 70 to 80 minutes to dry a load, the washer required 45 minutes. If I could reduce the cycle time, everybody would be happy, if I could reduce the cycle time, I would save electricity!
A dryer works by drawing low humidity (moisture) air into the dryer, transfers the huidity to the air, and exhausts the high humidity air out of the house. To speed up the transfer of humidity, the dryer heats the air using electricity (or gas!). In our case the dryer would heat the air for 60 minutes, then run an additional 10 minutes “cooling down”. 70 minutes total.
My goal was to reduce the cycle to 35 minutes heat on, with the 10 minutes cool down, 45 minutes total. The dryer time would match the washer time and save half of the electricity.
First I had to determine if this could be done. Since a dryers function is to remove moisture, I had to find a quicker way to remove moisture. The amount of moisture removed per minute is dependent on how much air goes through the dryer.
I needed more air through the dryer!
One would think the dryer manufacturers would have fixed every possible concern to insure their dryer dryed the fastest!!
Wrong.
More on why they do not fix the issue later.
I selected a group of towels for my standard load and decided to do some tests. Each time the load of towels were washed, then dryed.
My first sample load was dryed in 70 minutes, typical of the resuts we were used to.
Next, while the towels were washing again, I moved the dryer to the door. The doorway was blocked off with cardboard, except for a 4 inch round hole that was cut in for the exhaust vent. I used a 2 foot long piece of aluminum vent pipe to simply vent the dryer out the door through the hole in the cardboard.
In went the towels, the dryer finished the cycle in 38 minutes!! I was amazed! I re-did the load with the towels to verify my findings.
Again the cycle was 38 minutes. I reconnected the dryer to the vent exhaust and again dryed the towels, the cycle went back to 70 minutes.
I now had found the problem, the dryer vent was restricting the air flow, increasing the time for drying!
My dryer is located in the basement. The exhaust vent came out of the dryer, turned 90 degrees rose 7 feet, turned 90 degrees again, then exited out of the house through a flapper vent cap.
I needed to find a way to exhaust the dryer with the success of the dryer setting in the doorway with the short straight pipe!
I knew the family would not let me relocate the dryer to the doorway, even though it saved electricity.
Time to find a solution.
No, I was not going to invent a circuit board, nor was I going to start up a multi-milloin dollar company. My goal was to reduce my energy usage and save money NOW!! The materials had to come from the Big Box Hardware Store (BBHS) and be CHEAP!!
My training in airconditioning and Materials Science led to thinking that a larger diameter vent pipe would reduce the lost venting flow. All the items in the dryer vent section of the BBHS were 4 inch diameter. No help here.
I started to walk the store, there must be something here. Nothing! On to another BBHS. Up and down the isles, then, there it is! The second BBHS sold a 6 inch aluminum bathroom vent flapper. I could change the existing 4 inch flapper to 6 inch.
") Click on the images for a larger view!!
Click on the images for a larger view!!
")
Soon I found the mating 6 inch pipe. There was still 2 problems, the dryer was only designed to connect to 4 inch pipe, and there was going to be air flow losses at the 2 elbows I needed.
More searching. The first problem was quickly resolved. The BBHS offered a 4 inch to 6 inch transision adapter fitting. Problem 1 resolved.
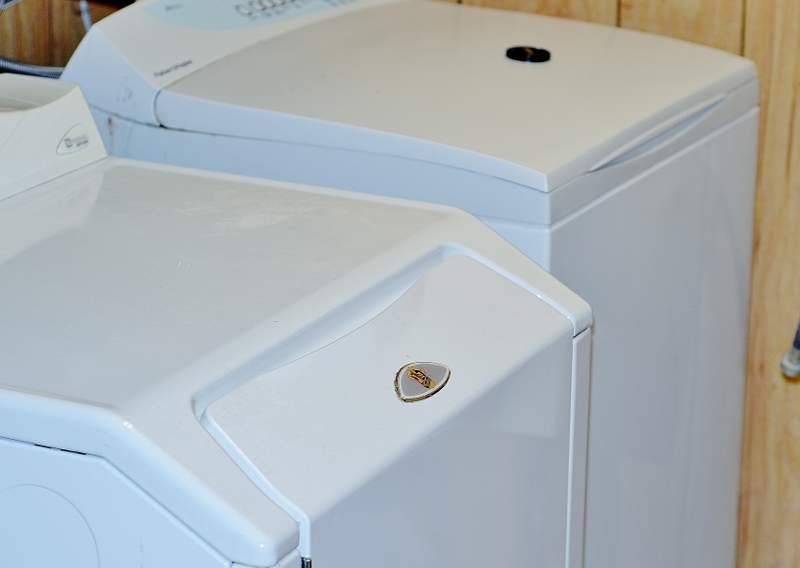
This adapter caused the dryer to set out from the wall a little further than the washer.
")
On to problem #2, the two elbows. Elbows are a notorious reducer of air flow. The solution had to be in the BBHS!! More looking. What I was looking for was a plentum. A plentum is the large ductwork box that sits on top of your forced air furnace.
The plentum gives enough room to allow air to turn 90 degrees in flow direction without restriction.
I found it! A 6 inch “T” fitting with a cap. The combination of the “T” and cap gave the air much more room to “turn” without restriction. I picked up 2 of each.

The green image on the left shows how the tee fitting gives a large area for the air to turn versus the limited area of the smaller red elbows.
Back home I started the assembly. The transition adapter was connected to the dryer. A short length of 6 inch pipe was cut to connect to the T fitting with one outlet of the T capped.
The vertical 6 inch was cut. The top T was fitted with a cap.
A side view of the assembly is shown here.

At the bottom is the red short length of 4 inch pipe, then the 4 inch to 6 inch adapter. Next is the 6 inch tee fitting with a cap at the bottom. The 72 inch long length of 6 inch duct leads up to the second 6 inch tee fitting. The upper tee fitting has the upper outlet plugged with a cap. The outlet to the right of the upper tee leads to the 6 inch building exhaust vent with flapper.
Next came the hard part, I had to enlarge the hole in the house from 4 inches to 6 inches to accomodate the new larger bathroom vent exhaust flapper. A little chiseling and the brick hole was enlarged. Some wood had to be removed with a sawsall. Done! The outlet of the top T fitting was then connected to the new exhaust vent flapper. I was almost done.
Since this was a test, I did not screw anything together, I simply assembled the parts.
Now to retest. In went the freshly washed towels. The dryer was started. Now the wait.
The time hit 38 minutes, the dryer was still running!! I waited. The dryer stopped at 41 minutes!!
I mention 80% of the benefits for 20% of the cost at the end of this article. Here we exceeded 80% of the savings for minimal cost,
so. SUCCESS!!
Here is an edge view of the wall that holds the 6 inch duct, note how the wall had to be spaced out from the foundation to accomodate the 6 inch duct and fittings.
")
Everybody in the family was amazed! The dryer was amazingly fast now. Most of the times the dryer would complete the drying cycle before the washer would finish.
The users were happy, I had achieved the electricity savings I was trying for. There was a BIG additional savings we had not planned on. The dryer was going to last MUCH longer!!
I believe this is the reason manufacturers do not tell you about this. If the dryer runs half as long to finish a load the dryer should last twice as long. Also since more air is flowing over the electrical heating element it will operate cooler, it will also last longer. Win – Win – Win!! Happy users, Less electricity, The equipment lasts longer.
What more could you ask for!!??
P.S. My daughter since bought a house. The dryer took TWICE as long to cycle as the washer. After the 6 inch pipe and fitting update, the cycles are now the same!
A note on safety:
The dryer is one of the items that cause fires in the home. Your dryer can collect lint, which is flammable. My system of venting was designe with very smooth inside surfaces so as not to capture lint. The lint that may collect, will fall to the lower 6 inch tee fitting of my system.

This is a very large area, and has shown only minor amounts of lint collection. most lint is blown out the exhaust. For safety, check your lint collection frequently.
If you like this idea, download the CADplans Corp. catalog at the right, for some really great ideas.
Soon I will write up my next step into reducing my total electric bill by half.
You have to question why I was able to find enough different methods to reduce my electricty usage by half. That is only normal.
I feel I have been successful due to my education.
When I graduated from high school, the military draft was in effect. The only way for me to defer my military service was to enroll in a technical school. I enrolled in air conditioning and refrigeration school at Connelly Tech in Pittsburgh Pa
There I studied thermodynamics for the first time. Heat transfer in refrigeration systems, heat thansfer in air, installation of ductwork and how air flows through ducts.
I studied heat!
After completion of the 2 year program, I enlisted in the US Navy.
Due to me having the technical education the Navy offered my a “A” school of my choice at the start of my actice duty.
I selected Shipfitter “A” school, where I learned basic welding, brazing and pipefitting for 26 weeks. The Navy condenses education to just what you need, I learned a lot in 26 weeks. The “A” school taught me more about heat. This was followed by “C1” welding school. “C1” was an intensive training in X-ray quality welding of plate steel.
More about heat!
After the schools I was assigned to a ship in Norfolk VA. The ship, the USS Hawkins was sent to dry dock for 9 months of overhaul. As I was now a Hull Technician, I was assigne to 6 months of fire fighter training while the ship was in drydock.
More training about heat!
After I finished my active duty, I found I had the GI Bill, which would pay for college. I selected to study Materials Science at Virginia Tech. At Tech, I studied Physical Chemistry (Thermodynamics at a molecular level) and we also studied heat transfer in metal melting furnaces EXTENSIVELY!!
Even more training about heat!
I know heat transfer!
After graduation from Tech, I soon had a job as a Manufacturing Engineer. For the next 10 years I had to implement new processes.
At this job I found I had two bosses. My first boss was the manager that wanted to see me implement new as well as cost savings projects.
My second boss was the hourly employees that had to use the new preocesses. If the hourly people did not like the new technique or process, the project would NOT be used, and would be a failure.
I soon learned the only way to be successful was to save LOTS of money as well as make the hourly employees happy. Win-Win!!
Using my knowledge of heat transfer, vapor pressures of liquids, and my expierence making people happy, I developed my methods to reduce electricity usage in my home.
My home is like most, typical square fottage, usual appliances. The BIG difference was I had a wife and TWO daughters. Those 3 were a tough group when it came to energy savings.
At first I tried the CFL bulbs. I might as well have tried to make them sleep in the woods (Our family does not camp!!). The CFLs’ were slow to come on, the color of light was “funny”. Back in went many incandecant bulbs!!
So much for CFLs’!!
Yea, we have some CFLs’but, we are not incandesant free!!
I soon learned eliminating phantom power uses was not going to work. Nobody was going to unplug ANYTHING!
I needed some new Ideas. I got a hold of a watt meter, Not the $15 cheapo, but, a meter that could monitor anything in the house that used electricity.
Item by Item, I determined where every watt-hour of electricity went in our home. Even down to how much phantom power the electric garage door openers use.
As a manufacturing engineer, my upper management would not allow a dollar to be spent on a project that took more than a year to payback.
Basically what management said was:
- there are too many projects, only pick the best ones to work on.
- use the 80/20 rule – get 80% of the savings with 20% of the effort. If we ever finish, we will go back for that other 20% of savings.
We never finished!!

Leave a Reply